WireGuard VPN
WireGuard VPN creates a secure, encrypted tunnel between your Cloudspace and external devices. Its lightweight protocol provides fast setup and robust security.
Overview
Each WireGuard interface in your Cloudspace has the following components:
- Name: A unique identifier for the interface within the Cloudspace.
- Address: The IP address assigned to the interface for routing traffic.
- Port: The port on which the interface listens for incoming connections. If not specified, a default port is used.
- MTU: The Maximum Transmission Unit — the largest packet size that can be transmitted.
- Private Key: Used to authenticate the interface and decrypt incoming traffic. Never shared.
- Public Key: Identifies your WireGuard interface to peers. Share this with devices that need to connect.
- Peers: External devices or endpoints that the WireGuard interface communicates with. Each peer has:
- Public Key: Authenticates the peer's identity.
- Allowed IPs: IP addresses or ranges routed through this peer. Setting
0.0.0.0/0routes all traffic through the VPN tunnel. - Endpoint: The address (IP or domain name) of the peer. Optional — the interface can learn it from incoming traffic, so you only need to set it for site-to-site peering, where the interface needs to initiate the connection rather than wait for it.
- Keep alive: Interval in seconds for keep-alive messages, useful for maintaining connections through firewalls or NAT.
Tip
If you do not provide public and private keys when creating an interface, they are generated automatically.
Creating a WireGuard Interface in the Portal
- Navigate to your Cloudspace details page.
- Select WIREGUARD VPNs from the tabs.
- Click Add WireGuard Interface to open the 4-step wizard:
- Interface Address — enter the address, or click Suggest IP Network to have the portal propose one. A help panel explains how to choose an address that doesn't conflict with your other networks.
- Port number & MTU — enter the port and MTU, or leave the defaults (port 51820, MTU 1420).
- Add key pair — choose Generate key pair automatically (the usual choice) or Add key manually if you already have a key pair.
- Create interface — enter a Name, then click ADD (or Cancel to back out).
The interface's public key is shown in the interface details page — you will need this to configure client devices.
The interface list shows Name, Address, Port, MTU and Public key columns. On each row, the configuration icon (Configuration) opens a dialog with the [Peer] configuration block for that interface (PublicKey, Endpoint and AllowedIPs), with CANCEL and COPY buttons.
Adding Peers (Client Devices)
Adding a peer is a 5-step wizard:
- Navigate to the WireGuard interface details page.
- Click Add Peer and step through:
- Public Key — choose Generate key pair automatically (the private key never leaves your browser) or Add key manually to provide a public key you already have.
- Allowed IPs
- Endpoint and Keep alive
- Add Peer — enter a Name, then click ADD (or Cancel).
- Download configuration file — click Download config to get the
.conffile for your device, or Go to peer details page to skip straight there.
After adding a peer, download the .conf configuration file provided by the portal — you will import this on your device.
Managing Peers
The peers table includes a Latest Handshake column showing when the peer last completed a handshake with the interface.
Update a Peer
- Navigate to the WireGuard interface details page.
- Click the peer to open its details.
- Each field (Name, Keep alive, Endpoint) has its own pencil icon — click it to edit that field in place, then confirm with the green checkmark or discard with the red X. There is no page-level Save button; the same per-field editing applies to the interface's own fields (Name, Address, MTU, Port) on its details page.
Delete a Peer
- Navigate to the WireGuard interface details page.
- Select the peer(s) you want to remove.
- Click DELETE SELECTED PEERS.
Adding Allowed IPs to a Peer
Allowed IPs control what traffic is routed through the VPN tunnel.
- Navigate to the peer details page.
- Click ADD ALLOWED IP.
- Enter the network value (e.g.
0.0.0.0/0for all traffic, or a specific subnet). - Check the NAT checkbox if needed.
- Optionally check the Inbound only checkbox to restrict the allowed IP to inbound traffic.
- Click SAVE.
Delete an Allowed IP
- Navigate to the peer details page.
- Select the IP(s) you want to remove.
- Click DELETE SELECTED IPS.
Deleting a WireGuard Interface
- Navigate to the Cloudspace details page and select WIREGUARD VPNs.
- Click the delete icon on the interface's row, or select the interface and click DELETE SELECTED WIREGUARD INTERFACES.
- Confirm in the Delete WireGuard interface dialog.
Configuring Your Device
After creating a WireGuard interface and adding your device as a peer in the portal, import the provided .conf file on your device.
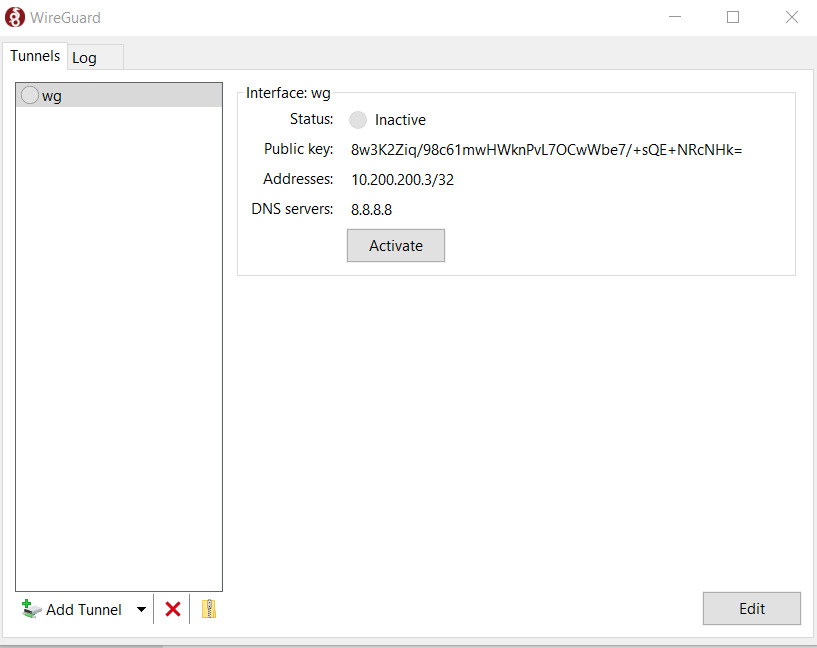
Windows and macOS
- Download the WireGuard client from wireguard.com/install.
- In the WireGuard app, click Import tunnel(s) from file.
- Select your
.conffile and click Activate.
Linux
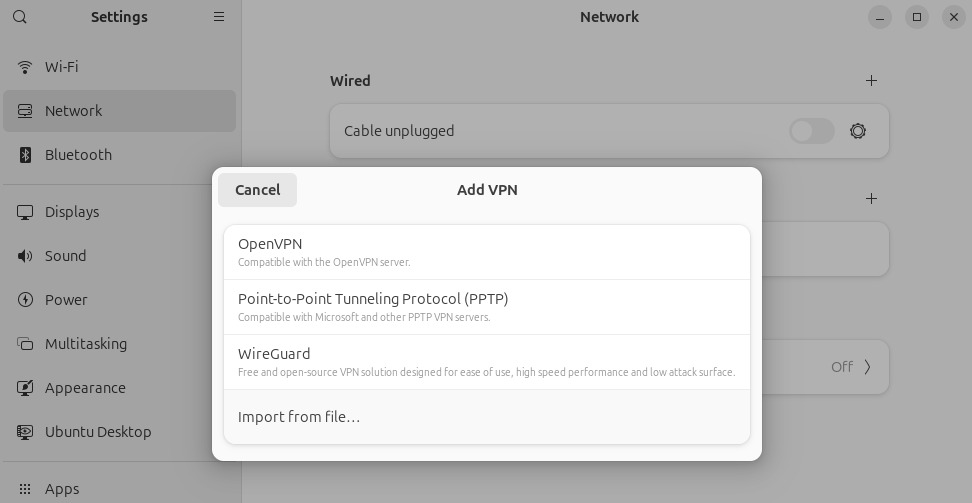
- Install WireGuard (e.g.
sudo apt install wireguardon Debian/Ubuntu). - Open Settings → Network and click to add a new VPN interface.
- Click Import from file... and select your
.conffile. - Click ADD.
- Enable the interface and test the connection:
How It Works
- You create a WireGuard interface in your Cloudspace in the portal. The portal generates (or you provide) a private/public key pair for the interface.
- You add your device as a peer to that interface, providing the device's WireGuard public key and the Allowed IPs that describe what traffic should flow through the VPN.
- You download the
.conffile from the portal, which contains the Cloudspace WireGuard interface's public key and the peer's endpoint information. - You import this
.confon your device. The device uses it to establish a secure tunnel to the Cloudspace. - Traffic matching the Allowed IPs is routed through the encrypted WireGuard tunnel.
Reachable IPs
On a WireGuard interface's details, the Reachable IPs section lists the external network IPs and gateway that are reachable through that interface.